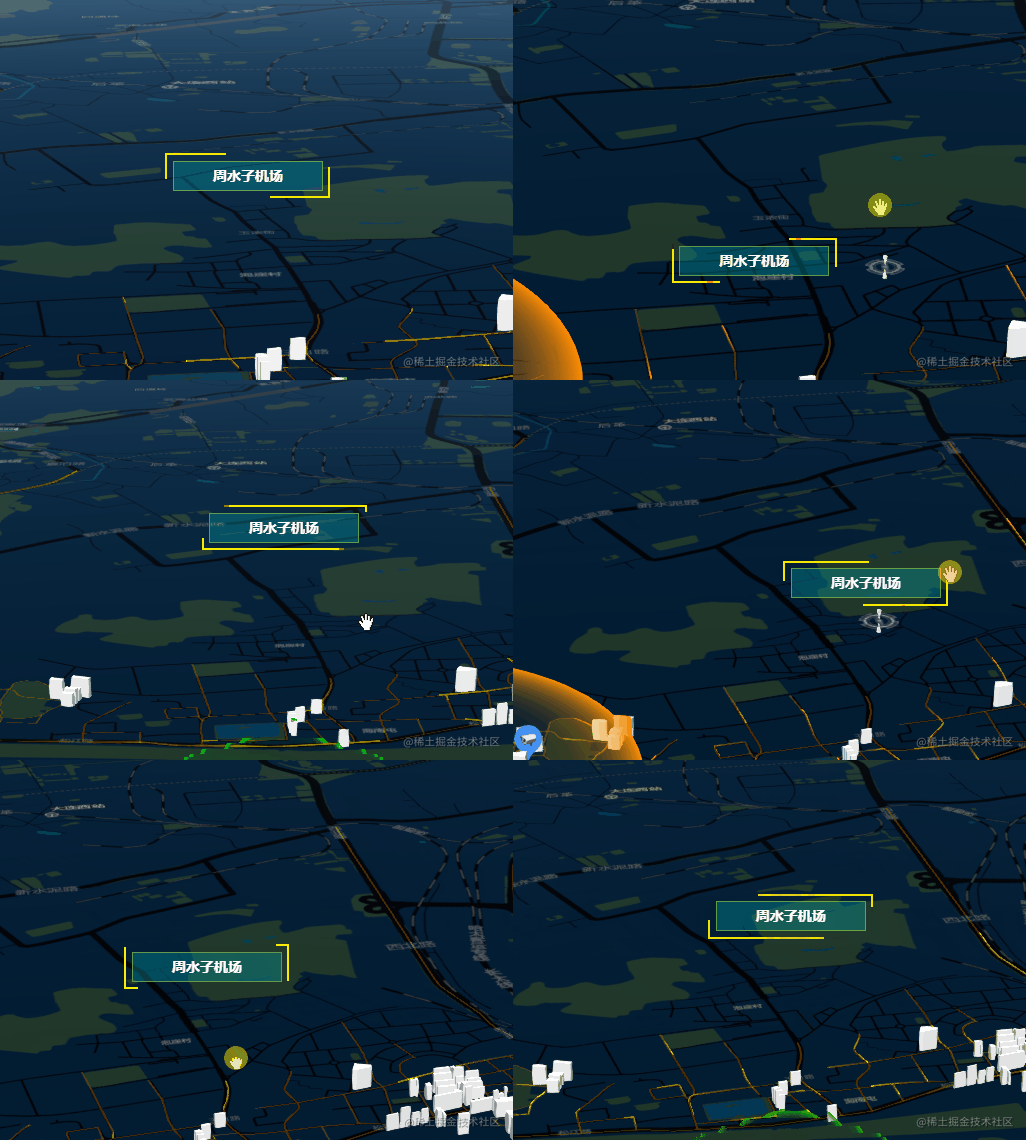
前言

前两天在资料中添加了自己的联系方式后,有些小伙伴加了我一起探讨关于Cesium效果及功能的实现,其中有不少人问到这个文本标记是如何实现的,一个个解答费时费力,索性写一篇文章把我实现的思路提供出来,并简单进行类封装,给大家抛砖引玉。
基本思路
本质上其实就是提供一个笛卡尔坐标,将DOM元素渲染到cesium容器中进行呈现。并利用postRender实时地更新位置,保证其与笛卡尔坐标一致。思路其实很简单,接下来我们进行实现。
基本实现
接下来的篇幅会一步一步完善标记点的方法,想直接看成品的小伙伴可以跳到方法实现的最后。
参数设定
首先最基本的就是position坐标、title标记内容和id唯一标识,其次我们可以增加一些参数比如说height标记的高度,以及隐藏高度等,可以根据自己的需求添加。
方法实现
同样的,首先我们需要生成一个球体做我们标记的容器。
1
| viewer = new Cesium.Viewer("cesiumContainer", {});
|
然后我们可以构建基础的添加标记点的方法并设定我们想要配置的参数,这里我只设置了基本的参数。
1
2
3
| addDynamicLabel({ position, title = "文本标记", id = "0" }) {
},
|
我们需要动态创建一个div作为标记点,并对其设置样式和内容,并将其添加到球体所在的容器中
1
2
3
4
5
6
7
8
9
10
11
12
| addDynamicLabel({ position, title = "文本标记", id = "0" }) {
let div = document.createElement("div");
div.id = id;
div.style.position = "absolute";
div.style.width = "100px";
div.style.height = "30px";
let divHTML = `
<div style="width:100px;height:30px;background:rgba(255,122,0,0.4)">${title}</div>
`;
div.innerHTML = divHTML;
viewer.cesiumWidget.container.appendChild(div);
},
|
现在我们已经把这个标记放到页面中了,虽然是绝对定位,但它并没有对应的top和left值,无法显示在我们想让它出现在的位置。接下来我们需要做的就是根据传入的坐标转换成屏幕的x,y作为标记的偏移量。Cesium提供了一个Cesium.SceneTransforms.wgs84ToWindowCoordinates()的方法供我们进行转换。
Cesium.SceneTransforms.wgs84ToWindowCoordinates(scene, position, result) → Cartesian2
将WGS84坐标中的位置转换为窗口坐标。 这通常用于将HTML元素与场景中的对象放置在相同的屏幕位置。
1
2
3
4
5
6
7
8
9
10
11
12
13
14
15
16
17
18
19
20
21
22
23
24
25
26
27
28
| addDynamicLabel({ position, title = "文本标记", id = "0" }) {
let div = document.createElement("div");
div.id = id;
div.style.position = "absolute";
div.style.width = "100px";
div.style.height = "30px";
let divHTML = `
<div style="width:100px;height:30px;background:rgba(255,122,0,0.4)">${title}</div>
`;
div.innerHTML = divHTML;
viewer.cesiumWidget.container.appendChild(div);
let vmPosition = Cesium.Cartesian3.fromDegrees(
position[0],
position[1],
500
);
const canvasHeight = viewer.scene.canvas.height;
const windowPosition = new Cesium.Cartesian2();
Cesium.SceneTransforms.wgs84ToWindowCoordinates(
viewer.scene,
vmPosition,
windowPosition
);
div.style.bottom = canvasHeight - windowPosition.y + "px";
const elWidth = div.offsetWidth;
div.style.left = windowPosition.x - elWidth / 2 + "px";
},
|
现在我们的标记点已经能够显示在正确的位置了,但是如果我们拖拽或放大缩小球体会发现,标记点它没动!这显然是不对的,标记点应该跟随球体的移动放缩而修改位置。这里简单说一下Cesium的渲染机制,在Cesium内部构建了一个定时器,用来不断的刷新并渲染页面,具体代码在CesiumWidget.js里,这里不赘述了……(其实是因为我没仔细的看过源码)。看了Cesium的机制后我们知道,想让标记跟随球体移动,就需要让标记也不断的刷新渲染。Cesium很贴心的为我们准备了scene.postRender,获取当前场景每帧渲染结束时的事件,监听该事件在每帧渲染结束时触发。我们只要对它进行事件监听就能够获取到每帧的事件。
1
2
3
4
5
6
7
8
9
10
11
12
13
14
15
16
17
18
19
20
21
22
23
24
25
26
27
28
29
| addDynamicLabel({ position, title = "文本标记", id = "0" }) {
let div = document.createElement("div");
div.id = id;
div.style.position = "absolute";
div.style.width = "100px";
div.style.height = "30px";
let divHTML = `
<div style="width:100px;height:30px;background:rgba(255,122,0,0.4)">${title}</div>
`;
div.innerHTML = divHTML;
viewer.cesiumWidget.container.appendChild(div);
let vmPosition = Cesium.Cartesian3.fromDegrees(
position[0],
position[1],
500
);
viewer.scene.postRender.addEventListener(() => {
const canvasHeight = viewer.scene.canvas.height;
const windowPosition = new Cesium.Cartesian2();
Cesium.SceneTransforms.wgs84ToWindowCoordinates(
viewer.scene,
vmPosition,
windowPosition
);
div.style.bottom = canvasHeight - windowPosition.y + "px";
const elWidth = div.offsetWidth;
div.style.left = windowPosition.x - elWidth / 2 + "px";
}, this);
},
|
方法构建完毕,我们只需要调用一下就可以看到我们的标记点已经出现在球体上了。
1
2
3
4
| let position = [121.54035, 38.92146],
title = "moe的标记",
id = 210204121;
this.addDynamicLabel({ position, title, id });
|

到这里其实基本的功能我们已经实现了,标记的样式我们可以自己变得酷炫,像我开头的动图那样。
封装类
在业务中可能很多地方都用到这个标记,最好的办法就是将它封装成一个插件文件即插即用。下面我们尝试把这个功能单独抽出来封装成类。这里我们使用es6的class进行封装。因为最开始我自己摸索封装的时候走了很多弯路,所以我想封装类这里也简单讲一下,以后大家做别的功能的时候也可以举一反三。
1
2
3
4
5
6
7
8
9
10
11
12
13
14
15
16
17
18
19
20
21
22
23
24
25
26
27
28
29
30
31
|
export default class DynamicLabel {
constructor({viewer , position , height , title , id , isHighHidden = true}) {
this.viewer = viewer;
this.height = height;
this.isHighHidden = isHighHidden;
this.position = Cesium.Cartesian3.fromDegrees(
position[0],
position[1],
height
);
this.addLabel();
}
addLabel() {
}
addPostRender() {
}
postRender() {
}
}
|
正常情况下这样我们就大功告成了,但我们加载DOM的方式显得太过粗鲁,而且不好维护,不能每次我们都通过innerHTML填充DOM元素或在字符串内去对内容及样式进行修改。这时候我们就可以使用Vue.extend + $mount构造器来创建一个”子类”了。这个方法也是我看过别人的开源代码后豁然开朗的,没想到还能这么用!长知识了。
我们首先创建一个vue文件label.vue,并把我们的标记样式什么的都写进去:
1
2
3
4
5
6
7
8
9
10
11
12
13
14
15
16
17
18
19
20
21
22
23
24
25
26
27
28
29
30
31
32
33
34
35
36
37
38
39
40
41
42
43
44
45
46
47
48
49
50
51
52
53
54
55
56
57
58
59
| <template>
<div :id="id" class="divlabel-container" v-if="show" >
<div class="animate-maker-border">
<span class="animate-marker__text">{{ title }}</span>
</div>
</div>
</template>
<script>
export default {
name: "DynamicLabel",
data() {
return {
show: true,
};
},
props: {
title: {
type: String,
default: "标题",
},
id:{
type:String,
default:'001'
}
},
};
</script>
<style lang="scss">
.divlabel-container {
position: absolute;
left: 0;
bottom: 0;
pointer-events: none;
cursor: pointer;
}
.animate-maker-border {
width: 150px;
height: 30px;
margin: 0;
color: #f7ea00;
box-shadow: inset 0 0 0 1px rgba(247, 234, 0, 0.56);
}
.animate-marker__text {
color: #fff;
font-size: 14px;
display: flex;
width: 100%;
height: 100%;
align-items: center;
justify-content: center;
font-weight: bolder;
user-select: none;
cursor: pointer;
background: rgba(0, 173, 181, 0.32);
}
</style>
|
接下来改造我们封装的DynamicLabel
1
2
3
4
5
6
7
8
9
10
11
12
13
14
15
16
17
18
19
20
21
22
23
24
25
26
27
28
29
30
31
32
33
34
35
36
37
38
39
40
41
42
43
44
45
46
47
48
49
50
51
52
53
54
55
56
57
58
59
60
61
62
63
|
import Vue from "vue";
import Label from "./label.vue";
let WindowVm = Vue.extend(Label);
export default class DynamicLabel {
constructor({viewer , position , height , title , id , isHighHidden = true}) {
this.viewer = viewer;
this.height = height;
this.isHighHidden = isHighHidden;
this.position = Cesium.Cartesian3.fromDegrees(
position[0],
position[1],
height
);
this.vmInstance = new WindowVm({
propsData: {
title,
id
}
}).$mount();
viewer.cesiumWidget.container.appendChild(this.vmInstance.$el);
this.addPostRender();
}
addPostRender() {
this.viewer.scene.postRender.addEventListener(this.postRender, this);
}
postRender() {
if (!this.vmInstance.$el || !this.vmInstance.$el.style) return;
const canvasHeight = this.viewer.scene.canvas.height;
const windowPosition = new Cesium.Cartesian2();
Cesium.SceneTransforms.wgs84ToWindowCoordinates(
this.viewer.scene,
this.position,
windowPosition
);
this.vmInstance.$el.style.bottom =
canvasHeight - windowPosition.y + this.height + "px";
const elWidth = this.vmInstance.$el.offsetWidth;
this.vmInstance.$el.style.left = windowPosition.x - elWidth / 2 + "px";
if (
this.viewer.camera.positionCartographic.height > 4000 &&
this.isHighHidden
) {
this.vmInstance.$el.style.display = "none";
} else {
this.vmInstance.$el.style.display = "block";
}
}
}
|
大功告成,现在看这个类是不是十分的清爽,关于Vue.extend的相关原理及操作我这里不多说明,大家可以百度。我在场景渲染方法中通过this.viewer.camera.positionCartographic.height添加了一个判断当前相机高度来决定标签是否显示,让这个插件更灵活。
最后我们只需要在我们的页面文件中引入并调用,就可以出现和之前方法实现中一样的效果啦~
1
2
3
4
5
6
7
8
9
10
11
| import DynamicLabel from './plugins/DynamicLabel'
addDynamicLabel() {
let label = new DynamicLabel({
viewer,
position:[121.54035, 38.92146] ,
height:500,
title:'moe的标签',
id:'210201025'
})
}
|
最后
这篇文章我们通过一个简单的文本标记提供了一个在Cesium场景中对指定功能进行实现以及封装成类的思路,其实很多的功能都可以像这样进行封装,比如自定义弹窗、雷达扫描效果、前一篇文章中的网格渲染,沿线飞行等。只要我们将基本的思路理清,其实都不难。或者可以像我一样,先用方法实现出功能,再一步一步得对其进行封装和暴露。觉得有帮助的兄弟可以点个👍关注一下专栏,Cesium和GIS相关的文章我都会收录进去。
